Creating social media posts inevitably means that you will need to use a graphic of some kind. You might be wondering why. Well, graphics are eye-catching and help to focus a post.
Using images related to the post content gives your audience a visual understanding of what and why you are posting. It’s also important to make sure your images align with your company’s corporate brand colors, fonts, logos, etc. Over time, people will recognize at first glance that the content is from your business, which helps build brand awareness and allows you to create a unified social media presence.
So, how do you create branded visuals for your social media posts? In this blog, we share our thoughts on one of our favorites – Canva, a user-friendly graphic design tool.
Canva is free, but you can upgrade to Canva Pro for more tools and features. The prices vary depending on the plan you choose. Creating a social media graphic in Canva is easy. There are plenty of templates to choose from that you can adjust to fit your business. As an example, we’ll walk you through the process of creating a social media graphic to promote a new blog post.
First, you need to look through the templates. Use keywords when searching for the right template. For this graphic let’s use “new blog post.” Here are the results:

There are a lot of templates to choose from, so to help you narrow it down, find one that aligns with your company’s brand image and is the right size for the intended social platform. For example, our new blog post graphic is for Instagram, so we need a square-shaped template.
Now you need to choose the right template, keeping in mind you need to be able to give your audience some information on the blog post such as the title and a brief summary of its content.
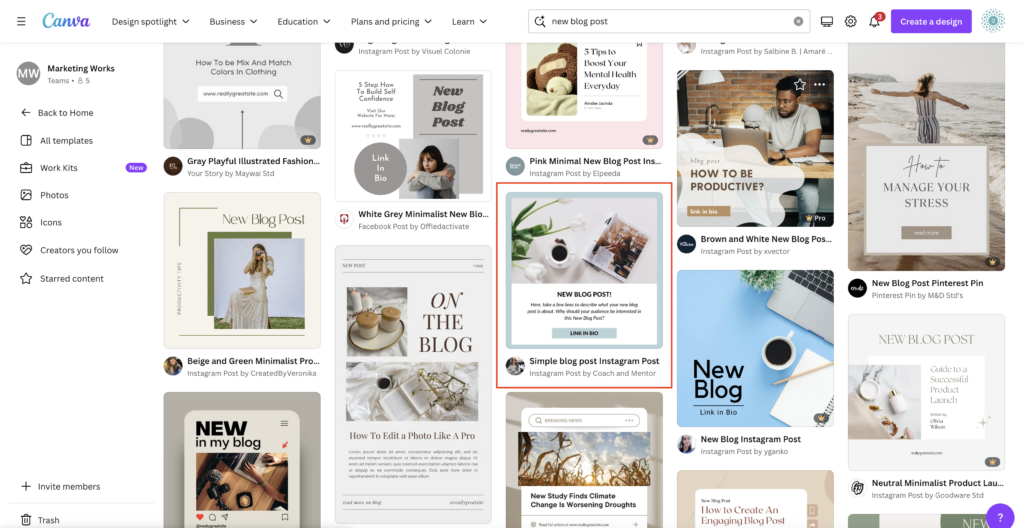
The template inside the red square looks like it fits the criteria. It’s the right shape and can display the necessary information. Let’s take a closer look before we decide.
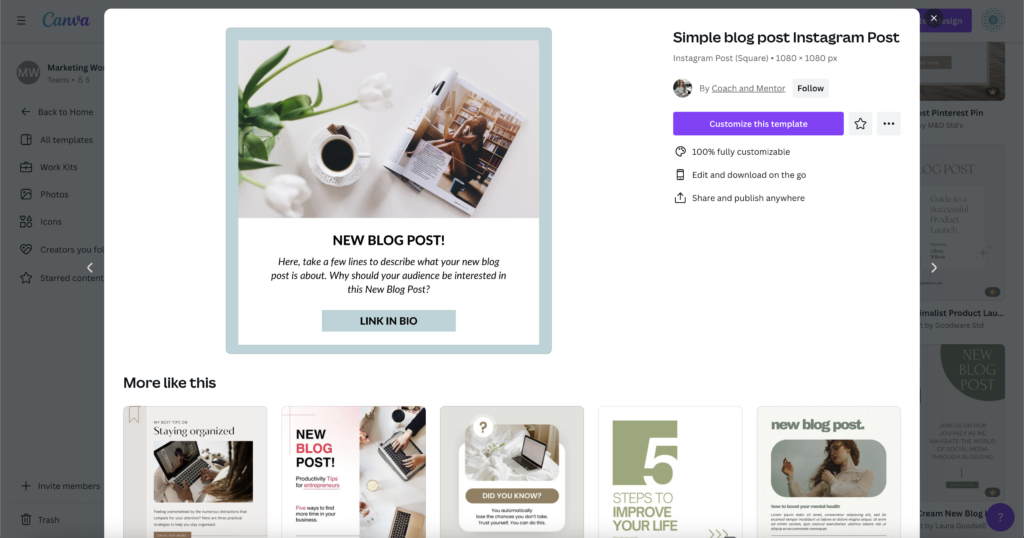
This template is great because it has a professional feel, and it has space to include the blog information and let your reader know how they can access the full blog. This template is also fully customizable, and it can be used anywhere, so it’s safe to use across social media platforms. Let’s customize it by clicking the purple button.
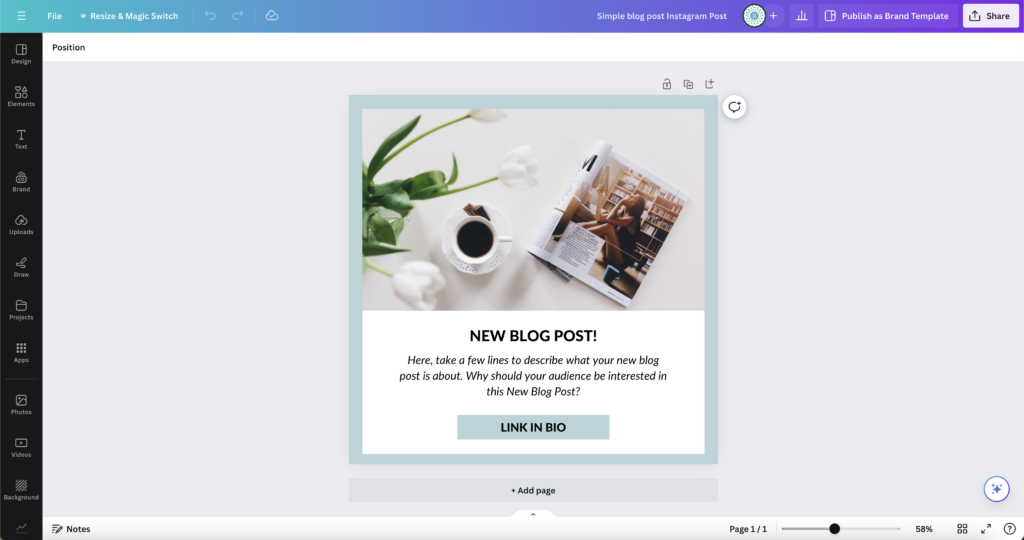
The two most obvious features you may need to change are colors and fonts so they align with your company’s brand. Next you can edit the text to include the blog title and a summary. To do that you need to unlock the background by hovering over the image and clicking on the lock that appears.
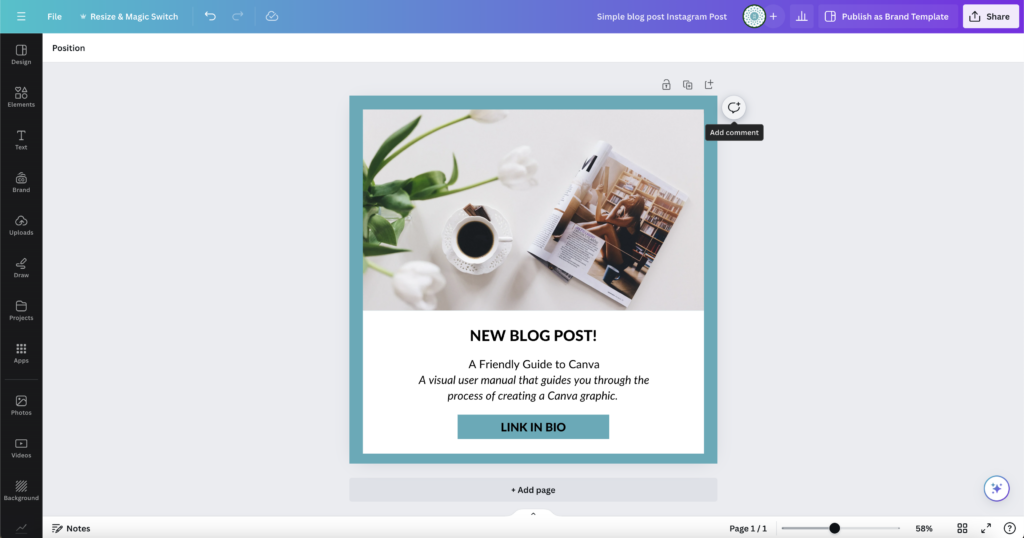
Now the graphic is displaying all the necessary information and is on brand. Let’s look at the image. The image is fine, but you can look through Canva’s stock images to see if there are others that are a better match for the topic of the blog. Canva images are great because they are all royalty free, so you don’t have to worry about copyright issues.
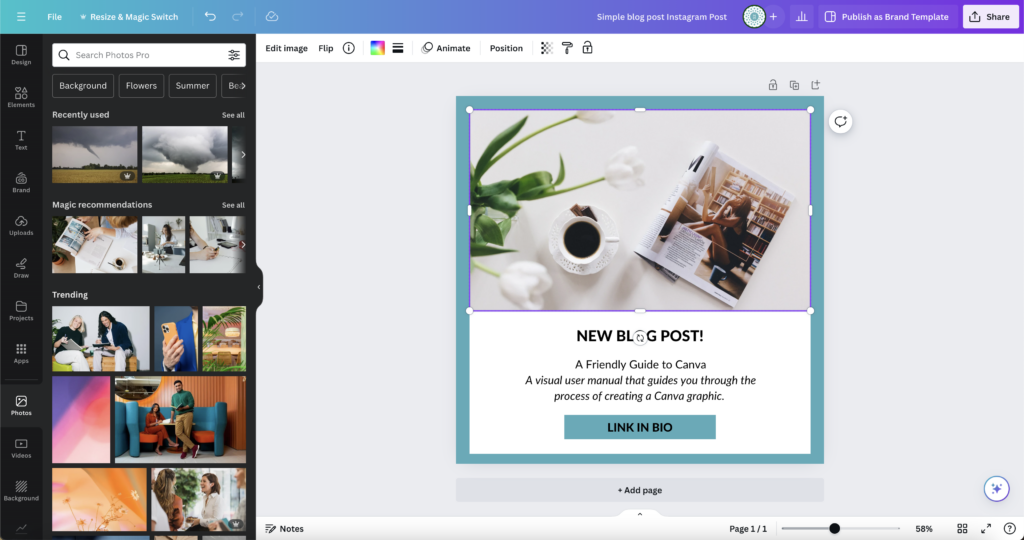
By opening the black tool bar along the left side of the screen, you can select the photos icon to look through some images. Using the “Magic recommendations” feature will show you images that are similar to the current template.
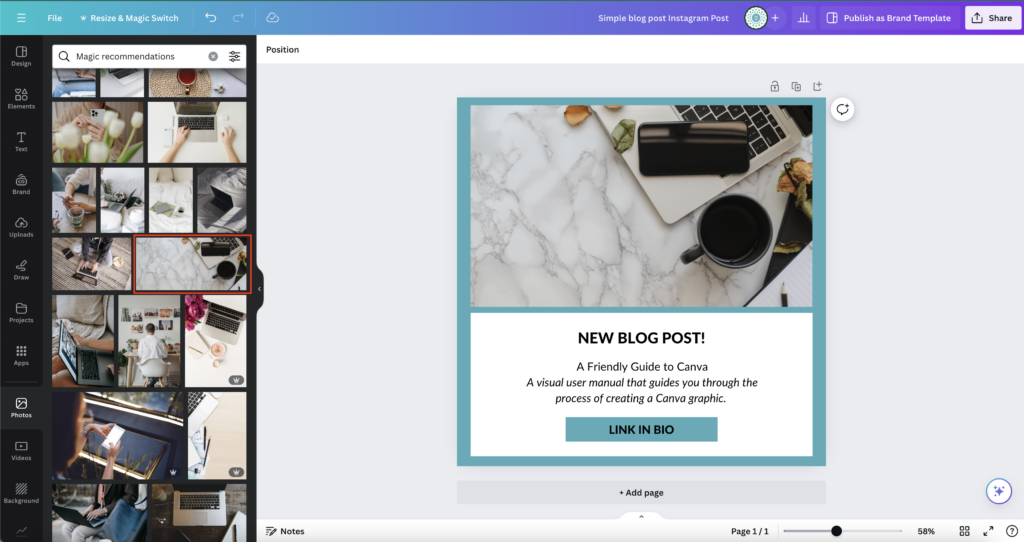
Once you’ve selected the image and have it placed in the graphic, you’re now ready to submit the graphic for posting.
Creating and utilizing graphics isn’t too difficult. It’s just creating an image that represents your brand and your content. Keeping this graphics consistent in message, tone, and branding will be what sets your company apart from others and cultivate brand recognition. Utilizing the tools displayed in this user guide to create a branding practice can help your business establish social media success and provide your clients with brand stability they can trust.
